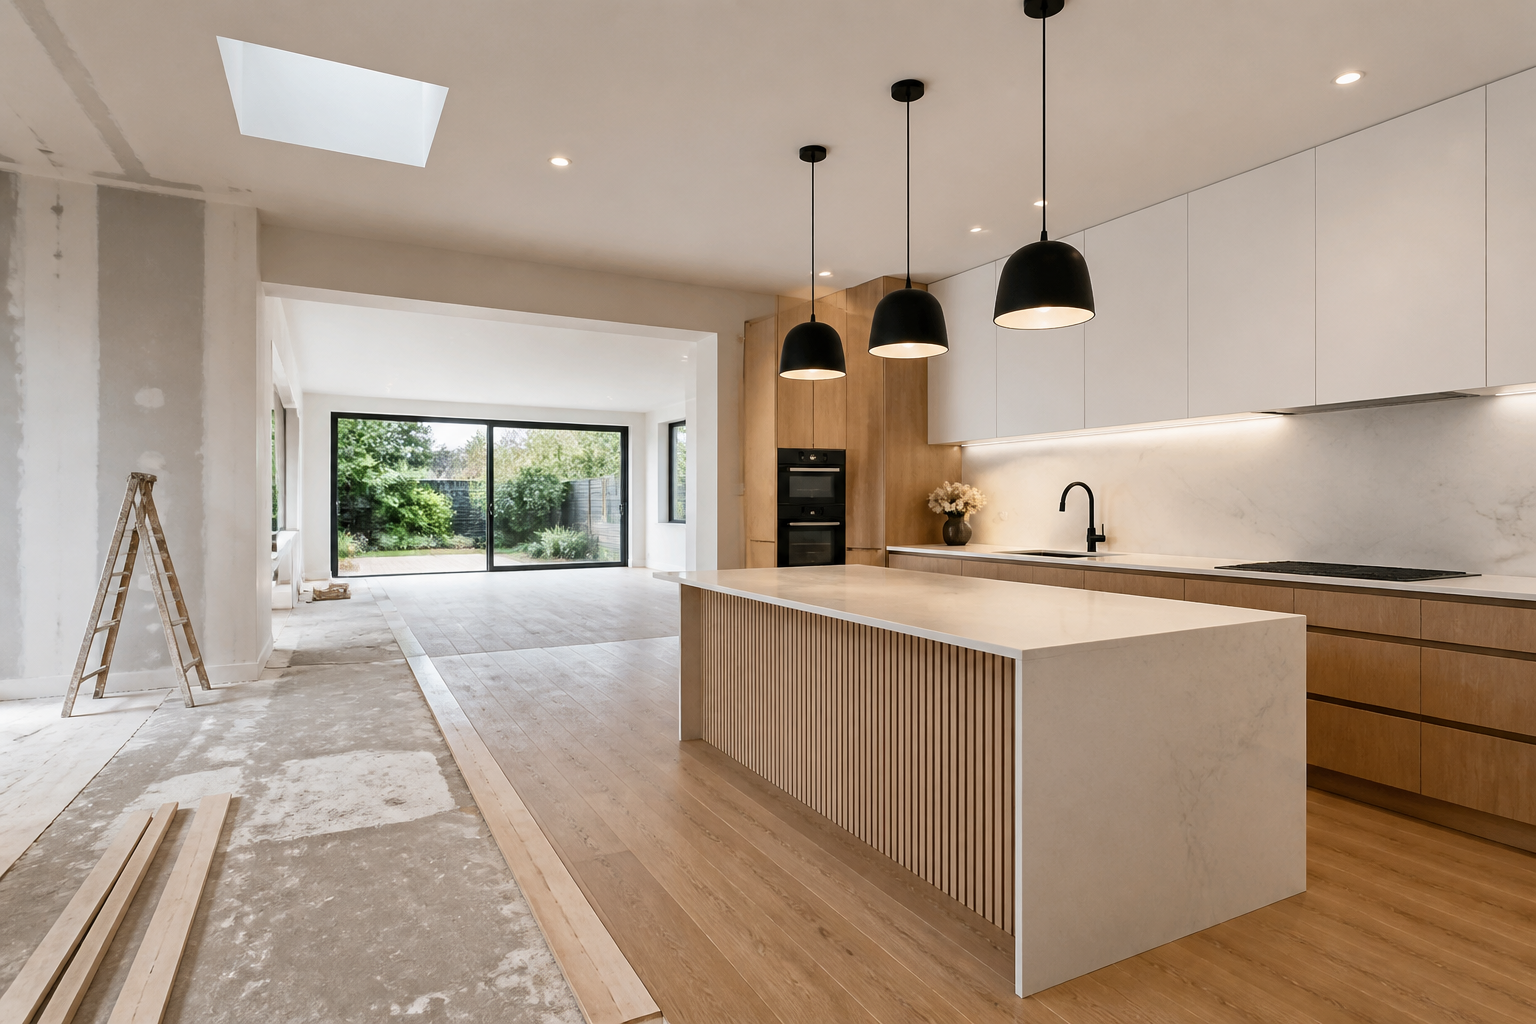
Home renovations: room-by-room planning and sequencing checklist
Whether you are refreshing finishes or rethinking how your home works, the most reliable way to approach home renovations is to break the job into clear decisions, lock in a logical sequence, and keep quality control visible from day one. This practical checklist walks through the major planning moves, then drills down room by room so you can organize scope, timing, and expectations before the first wall is opened.
Define scope and goals
Start by writing a short project brief you can share with everyone involved. Keep it simple but precise.
- Rooms and areas: list everything that will change (kitchen, primary bath, flooring throughout, lighting, entry storage, etc.).
- Functional goals: more counter space, added storage, better lighting, improved traffic flow, durability for kids and pets.
- Non-negotiables: must-keep features, materials you already own, dates you need the space usable.
- Constraints: structural walls, plumbing locations, ceiling heights, natural light, and access for materials.
- Decision owners: who approves design choices, change requests, and scheduling trade-offs.
Clarity here reduces rework later. Treat the brief as a living document you update when decisions are finalized.
Set priorities and sequencing
Most home renovations share a dependable order of operations. Establishing sequence early helps you bundle work efficiently and avoid backtracking.
- Site protection and temporary setups: floor protection, dust barriers, a temporary kitchen or bathroom if needed.
- Demolition and removals: cabinets, fixtures, finishes, and any walls slated for change.
- Rough-ins and behind-the-wall work: framing, HVAC adjustments, electrical rough-in, plumbing rough-in.
- Close-in: insulation where applicable, drywall hang, tape, and sand.
- Prime and paint (first coats): prepare surfaces before major installs.
- Hard installs: cabinets, tile, countertops, flooring, doors, trim, and built-ins.
- Finish trades: plumbing and electrical fixtures, hardware, mirrors, glass, and accessories.
- Final paint, caulking, touch-ups, and cleaning.
- Punch-list and sign-off: walk-through to capture outstanding items and confirm completion.
When multiple rooms are included, sequence disruptive work first and consolidate similar tasks (for example, complete all rough electrical together). For a primer on how trades interlock, see this overview of construction project coordination.
Budget basics and contingency (without numbers)
Without quoting figures, you can still build a budget structure that protects your plan:
- Allocate by category: demolition, framing, electrical, plumbing, HVAC, drywall, paint, flooring, tile, millwork/cabinetry, countertops, fixtures, lighting, hardware, cleanup.
- Flag allowances: line items where exact products aren’t chosen yet (tile, fixtures, lighting). Record the target specification so substitutions are easy to compare later.
- Hold a contingency: set aside a percentage for surprises uncovered during demolition or for design changes. Keep this separate and only tap it when you document why.
- Track changes: use simple change logs noting the date, reason, and effect on schedule and scope.
This structure makes it easier to understand trade-offs when you refine finishes or adjust scope.
Design and specifications you’ll want to lock early
Timely decisions prevent bottlenecks. Lock these items early so lead times don’t stall work:
- Cabinet layouts and appliance sizes (even if the exact brand is TBD).
- Plumbing fixture types and locations (wall-mount vs. deck-mount, shower system configuration).
- Electrical plan: lighting layers, switch and dimmer locations, island/pantry outlets, low-voltage needs.
- Flooring species or tile sizes; transitions between rooms; thresholds at baths.
- Countertop material and edge details; sink type (undermount, apron, integral).
- Ventilation: kitchen hood pathing and bath exhaust runs.
- Storage: built-ins, closets, vanity drawer vs. door configurations.
Use product spec sheets and cut sheets to confirm dimensions before rough-ins, so framing and services line up with the final fixtures and cabinets.
Permits and professional limits
Some work may require permits or design stamps depending on your jurisdiction and the scope of changes. Because rules vary by location and scope, this article does not provide legal or regulatory advice. If you plan structural changes, new openings, major plumbing or electrical moves, or significant layout changes, consult your local authority and appropriate licensed professionals to determine what approvals are required.
Room-by-room checklists
Dial in the details for each space using these compact prompts.
Kitchen
- Workflow: confirm sink–range–fridge triangle, landing zones beside cooking and refrigeration, and clearances for aisles and islands.
- Storage: mix of drawers and doors; pull-outs for pans; trash/recycling; tall pantry; tray dividers; corner solutions.
- Electrical: dedicated circuits for major appliances; task, ambient, and accent lighting; under-cabinet outlets or lighting strips.
- Ventilation: ducted hood path and size; makeup air needs based on hood capacity and local requirements.
- Surfaces: durable countertop near sink; heat-resistant landing; splash protection behind range and sink.
- Water: shut-off access; filtration; dishwasher air gap or high loop per manufacturer guidance.
- Details: end panels, fillers, toe-kicks, crown, light rail, and scribe for a finished look.
Explore scope ideas and examples in these home renovations service details.
Bathroom
- Waterproofing: shower pan, walls, niches, benches; continuous membrane behind tile where applicable.
- Drainage and slopes: proper fall to drains; linear vs. centre drains; curb vs. curbless planning.
- Ventilation: quiet, correctly sized exhaust fan; duct routing to exterior; timers or humidity sensors.
- Fixture placement: clearances at toilets and vanities; mirror height; sconce vs. overhead lighting.
- Storage: recessed niches; vanity drawers; medicine cabinets; towel and robe hook placement.
- Surfaces: slip-conscious floor selections; grout joint sizes; sealant transitions; glass door swings.
Living, dining, and hallways
- Lighting layers: ambient (ceiling), task (floor/table), and accent (wall/feature).
- Wall features: media wall wiring; blocking for shelves; feature wall materials and reveals.
- Circulation: furniture plan clearances; door swing coordination; baseboard and casing profiles for consistency.
- Acoustics: area rugs, soft furnishings, and drapery to manage echo in hard-surface rooms.
Bedrooms
- Closets: double vs. single hanging; drawers vs. shelves; lighting inside closets with door-activated switches if desired.
- Power and data: outlets for bedside charging; switched receptacles or sconces; low-voltage for streaming.
- Window treatments: blackout capability for primary suites; child-safe hardware in kids’ rooms.
Laundry and mudroom
- Appliance placement: side-by-side vs. stacked; clearances for hoses and vents; drip pans where applicable.
- Drainage and ventilation: routing for dryer; backdraft dampers; floor drains if part of the plan.
- Storage and benches: cubbies, hooks, and easy-clean surfaces for daily wear and gear.
Basement and flex spaces
- Moisture strategy: check for signs of water ingress; plan vapour control and insulation assemblies accordingly.
- Egress and headroom: confirm safe access and clearances for finished ceilings and bulkheads.
- Zones: plan quiet work areas vs. media spaces; wiring for speakers, data, and lighting scenes.
Timeline and logistics you’ll actually feel day to day
Even with a solid sequence, daily logistics determine comfort and momentum.
- Protection and cleanliness: walk-off mats, zipper walls, negative air where dusty work occurs, and scheduled clean-ups.
- Staging: designate a materials landing zone; protect finished areas from through-traffic.
- Deliveries and lead items: confirm when cabinets, appliances, and glass will arrive relative to install stages.
- Access and security: key safes, work hours, pet plans, and parking.
- Communication rhythm: brief daily or weekly updates summarizing what’s done, what’s next, and decisions needed.
Working with contractors: questions that keep projects clear
Good questions reduce ambiguity and help everyone align on expectations. Consider asking:
- Sequence and dependencies: what needs to be approved now to protect the critical path?
- Site rules: how will dust be controlled, where will staging occur, and what’s the cleanup plan?
- Change handling: how are changes documented and authorized, and how do they affect timing?
- Closeout: what constitutes substantial completion, and how is the punch-list managed and verified?
If you want to see visual examples of finished spaces before you decide, browse a renovations portfolio to compare finish levels and layout solutions.
Quality control and punch-list
Quality is easier to achieve when it’s measured. Use structured checkpoints:
- Pre-close inspections: verify rough-in locations vs. drawings; take photos before drywall for future reference.
- Substrate checks: flatness of floors and walls, plumb corners, and square openings before tile and cabinetry.
- Finish mockups: approve a small test area for tile pattern, grout colour, and paint sheen.
- Fixture function tests: fill and drain, run exhaust fans, test GFCI outlets and dimmers, confirm appliance clearances.
- Detail pass: caulk lines, paint cut-ins, trim joints, door reveals, and hardware alignment.
- Final clean: dust at high surfaces, inside cabinets and drawers, and protective film removal.
Capture any issues in a dated punch-list and close them systematically. Keep all manuals, warranties, and care guides together for ongoing maintenance.
Frequently asked questions
What’s the smartest order to tackle multiple rooms?
Prioritize work that affects the most systems first (structural adjustments, electrical service changes, major plumbing moves). Then complete disruptive wet areas like bathrooms and kitchens before finishing widespread items such as flooring and paint. Bundle similar tasks across rooms—do all rough-ins, then all drywall, then all trim—to reduce setup time and improve consistency.
Can I live at home during renovations?
Many projects proceed while people remain in the house, but comfort depends on the scope. Mitigate disruption with dust barriers, clear circulation paths, a temporary kitchen setup, and a predictable work schedule. If your only full bathroom or the kitchen is offline for a stretch, plan temporary alternatives or a short stay elsewhere to reduce stress.
Do I need permits for interior work?
Permit requirements vary by location and scope. Cosmetic updates often don’t require approvals, while structural changes, new openings, major plumbing or electrical modifications, and some layout changes may. Consult your local authority and qualified professionals for guidance specific to your project. This article does not provide legal or regulatory advice.
How do I avoid decision fatigue mid-project?
Batch decisions before work starts. Finalize cabinet layouts, fixture types, tile selections, and lighting plans early. Keep a simple matrix of product names, finishes, and locations. When a substitution is needed, compare against the matrix so you maintain design intent without starting from scratch.
What’s a practical way to keep the project on schedule?
Protect the critical path: lock lead-time items early, answer requests for information quickly, and keep a short weekly agenda listing what was completed, what’s next, and decisions required. Coordinate deliveries to land just before installation and confirm site access and staging plans in advance.
Ready to turn planning into action? Review examples and scope outlines for home renovations, then organize your brief and sequencing steps using the checklists above.